Joined: Thu Mar 17, 2011 8:34 am Posts: 5323 Location: Tasmania
I've got a couple of little projects to show you in this post, and there's a bit of a story behind it......
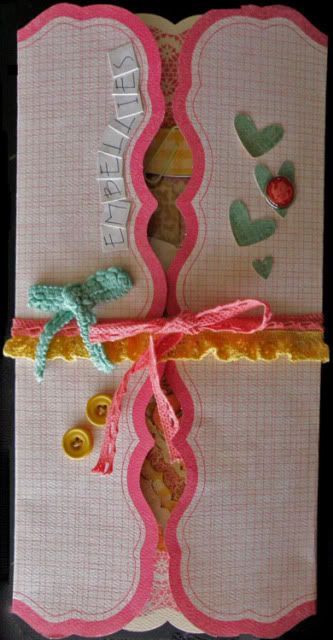
You know when you might be working with a range, or colours or bits and pieces and they get lost under things, drop on the floor or completely go missing altogether because the project isnt done in one sitting.... (weeeeeeell maybe you dont....BUT I DO!) I'm hopeless for losing things on and under my desk! (even in one sitting!) So I usually grab one sheet of paper, fold it in thirds and tie a ribbon around it. It doesnt have a bottom in it to stop things falling out though you 'could' do that... but for me it has to be something simple and quick - to be practical just as a storage holder to keep things together...
Sooooooo what I originally started to do was show you how to make my little 'Fish' embellie... but I lost 'stuff'!!!
And thought.... 'GOOD GRIEF'... make a folder, gather the stuff, and then show the fish LOL!!
Once you open the folder to see the inside... this is where I store my 'bits' (its tidy right now...but wasnt!) I glued some very thin strips down the creases of the 12x12 diecut. And as you can see - this doesnt have to be a folder... you could use it as an enclosed LO! Place pics and embellies too! There's no end to what you could use one sheet of 12x12 diecut paper for!
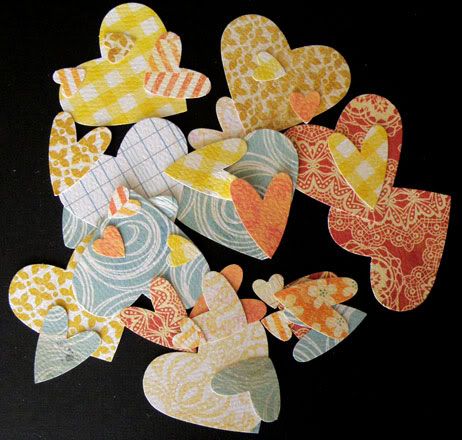
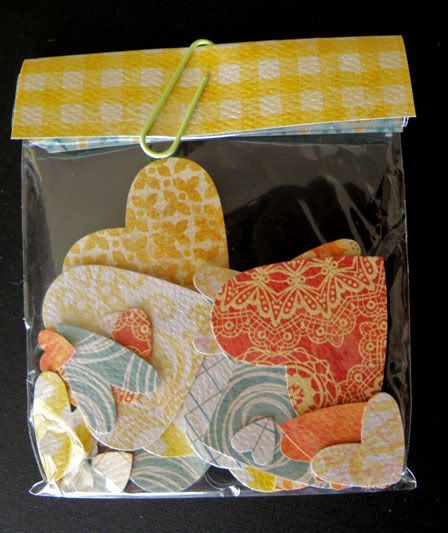
The little hearts.... I usually try to punch scraps into shapes and pop away for when the need arises...so my MME scraps - had the heart punch nearby so had a bit of a go with that! And to be nice and tidy (and keep pretty for you) made up a little packet for them
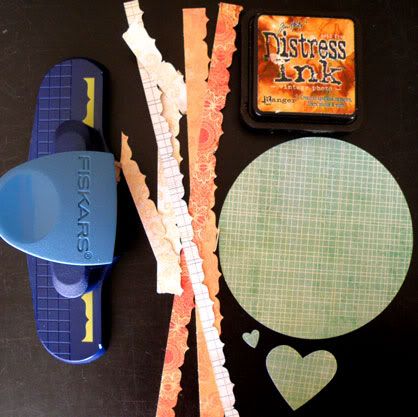
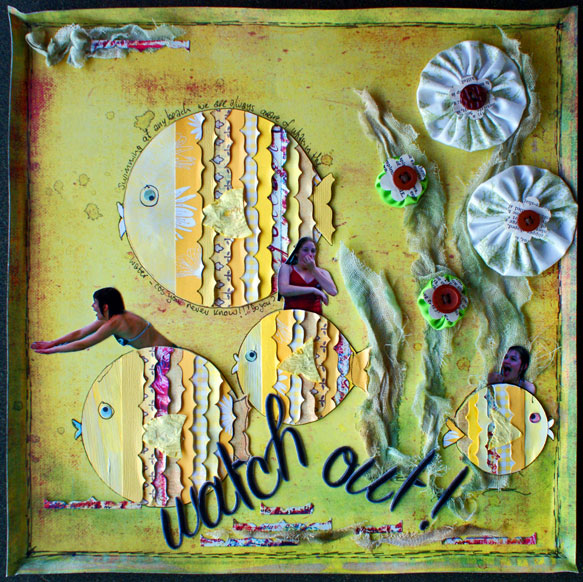
AND now for the FISH! As you can see this is bits and piece-y too! I did have these bundled into the folder...
Anyway, lets put it together to make the end result... Make a circle with paper... Just punch out those strips with a waters edge punch or anything scallopy like that.... lay them out on top of your circle just to measure how many you need (as above) and ink the edges.... place the scallop side towards the fish tail and the straight side towards the fish's eye.... start at the tail and work towards the fish's eye sticking them down...only put the glue along the straight edge and very slightly turn up the scallops to give a 3d-ish effect. Turn the circle over and trim off the excess strips along the circle shape. Then ink two big hearts and stick one as the tail and the other one as a fin... and the tiny heart as some lips! I've used a couple of little paper circles and a brad for an eye, but you can use what you like. Dont forget to ink right around the fish to finish... I've used a little tag to dress up the fin Stella & Rose Mabel 'Joy'Layered Stickers
I love that fish and better still I love the idea of keeping everything together - and I think you get the star prize for linking the very most things to the shop EVER! LOL
Mandy, I have my sick little boy sitting here on my lap & you have no idea how impressed he is with your fish !!! You definitely get a gold star for making him smile.
Mandy, this little fish is just so cute, and the folder idea.. that's a keeper for sure.. i'm always losing things, when i know i've only put them own 30 seconds before..
Users browsing this forum: No registered users and 1 guest
You cannot post new topics in this forum You cannot reply to topics in this forum You cannot edit your posts in this forum You cannot delete your posts in this forum You cannot post attachments in this forum


