Scrap Therapy
https://www.old.scraptherapy.com.au/forum/

Paint/Pearl Mist Step by Step LO by Mandy
https://www.old.scraptherapy.com.au/forum/viewtopic.php?f=345&t=11319
Page 1 of 1

Author:  mandysea [ Fri Aug 10, 2012 1:27 pm ]
Post subject:  Paint/Pearl Mist Step by Step LO by Mandy

If you love playing with wet media, or would like to have a go at playing with it... here's a little step tutorial to try.
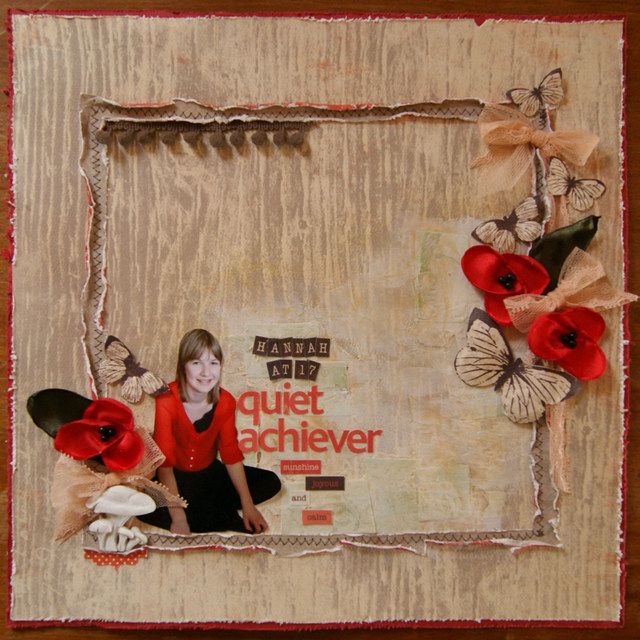
I love framing my LO's, one way or another - I'll manage it somehow on most of my LO's :lol: I'm not sure why, maybe it just gives it some sort of balance or finish?
Here I've used WRMK's Cherry Cardstock as the outside frame (I always cut my middles out to use for something else and to take some weight out of the LO
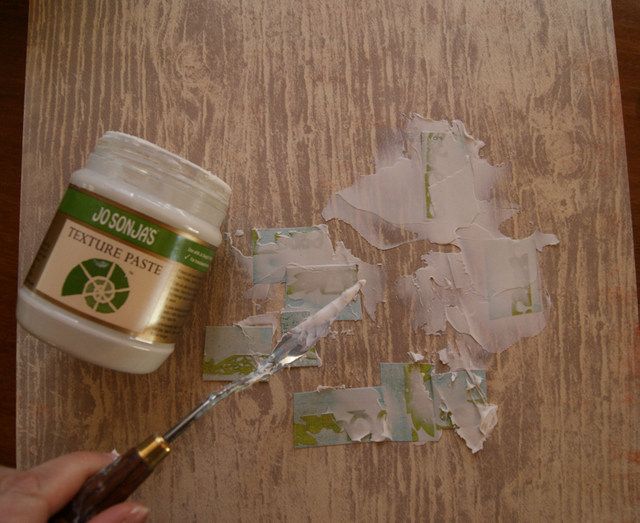
 :wink: ) The background paper is Authentic Carefree Jovial Paper and is cut down a little on each side to show a thin frame of the red. And the little sewn down inside frame is Authentique Carefree Content Paper I've distressed all the edges :P
Image


Step One
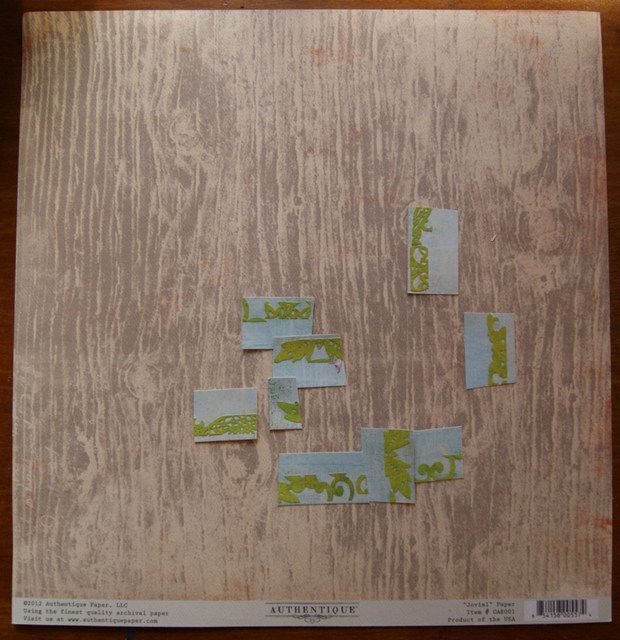
Find some scraps and cut into rough little rectangles and stick down on the paper
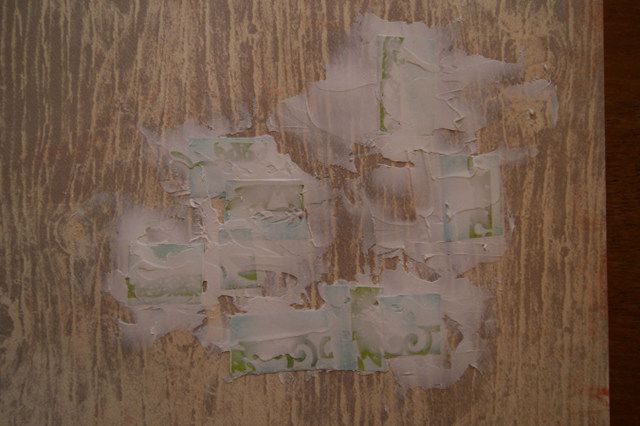
Image


Step Two
Apply texture paste (this is fabulous stuff!!) with a spatula (so fun to play with!)
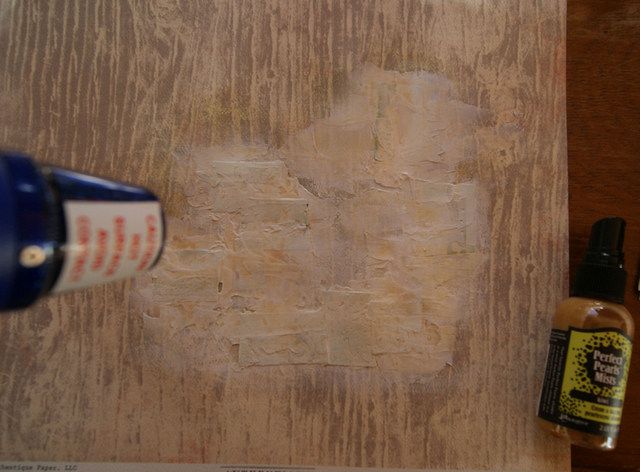
Image

Image


Step Three
Time to use those wonderful Ranger Dabbers!!! I've used Adirondack Snow Cap to rub over the texture paste (once it had dried) and then once the Dabber paint had dried, I misted with Perfect Pearls Kiwi. Its really hard to capture the gorgeous glossimer/pearlised coverage it gives, but look through the photos here and I may have captured it once or twice. It gives a lovely sepia/nature tinge to the area.
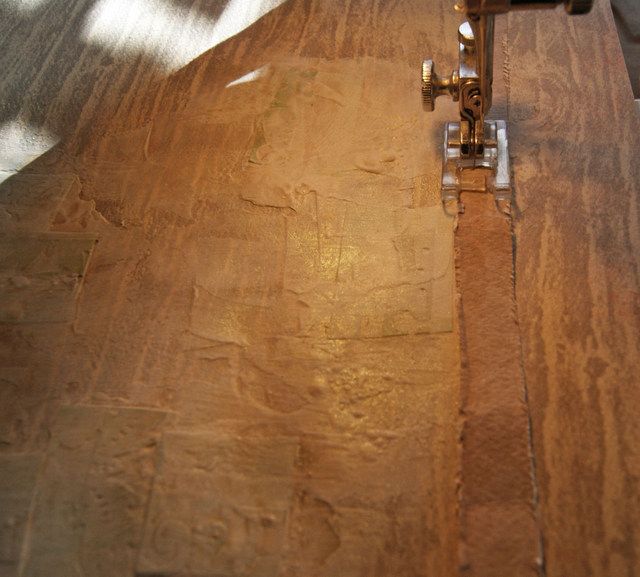
Image


Step Four
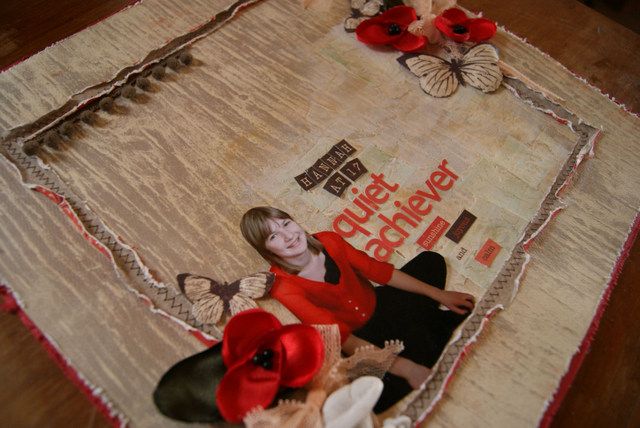
For the smaller inside frame, I've cut a 25cm square and then created the frame by cutting the inside of the square out by leaving the frame about 1cm wide. I cut it roughly because I knew I would distress it, but if you dont want distressing, you might want to be a little more precise in your measurements. Out with the sewing machine with black thread and using zigzag, sew down the frame. If you dont want to sew - use one of these Tim Holtz Die Picks and make zigzag holes and join the dots with a black marker :P
Image


Step Five
Rough up the distressed edges so the red coloured reverse side of the sewn frame can be seen :wink: It should look like this below:
Image


Step Six
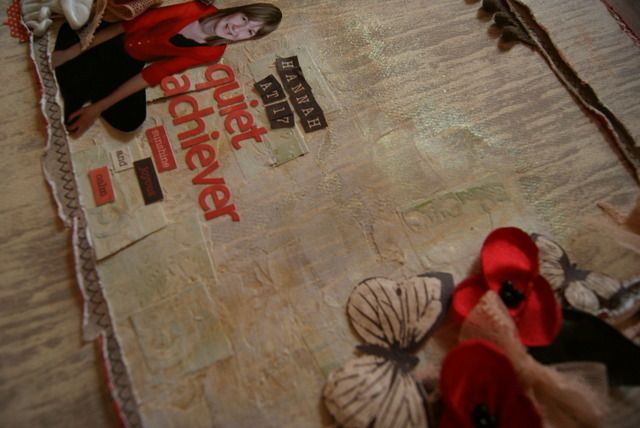
Time to add the photo and embellishments. Here I've used three Prima Poppy Flowers and leaves, Prima Resin Mushrooms, Apricot lace trim from Webster Fabric Ribbons set and cut out various sizes of butterflies from Authentique Carefree Relaxed Paper (this is fabulous paper because the amount of butterflies are endless - and a cheap alternative!) The Alpha and little words are Authentique Alpha Elements
Image


Aha! here you can see that lovely pearlised misting! :P :P
Image


Image

Author:  julie21566 [ Fri Aug 10, 2012 8:28 pm ]
Post subject:  Re: Paint/Pearl Mist Step by Step LO by Mandy

simply stunning missy.

Author:  mandysea [ Fri Aug 10, 2012 8:29 pm ]
Post subject:  Re: Paint/Pearl Mist Step by Step LO by Mandy

Thanks bloss :biggrin: :wink:

Author:  Lee-Anne [ Fri Aug 10, 2012 8:40 pm ]
Post subject:  Re: Paint/Pearl Mist Step by Step LO by Mandy

wow my dear - you put so much effort into your beautiful work - thanks for sharing, I have considered texture paste for the shop, but it is impossible to post, girls you should be able to grab it at your local art and craft stores, it is cheap as chips and a good addition to your scrapping collection

Author:  mandysea [ Fri Aug 10, 2012 8:43 pm ]
Post subject:  Re: Paint/Pearl Mist Step by Step LO by Mandy

Thanks Lee-Anne
Yeah, a tub would be bulky to post and its not expensive to get from craft stores or art shops :P Its great medium as with gesso which is a great sealer and runnier to use. Both are musts for the scrappy shelf :P

Author:  Deb MK [ Fri Aug 10, 2012 9:21 pm ]
Post subject:  Re: Paint/Pearl Mist Step by Step LO by Mandy

This is just fabulous, Mandy.

Author:  Mel73 [ Fri Aug 10, 2012 10:39 pm ]
Post subject:  Re: Paint/Pearl Mist Step by Step LO by Mandy

I reckon..love your tute Mandy...didn't even notice those bits of paper in the background till you showed how to do it....looks amazing!!

Author:  Christine19850 [ Sat Aug 11, 2012 3:01 pm ]
Post subject:  Re: Paint/Pearl Mist Step by Step LO by Mandy

I love your techniques Mandy - thanks for sharing!

Author:  AnitaMarie [ Fri Sep 07, 2012 10:33 pm ]
Post subject:  Re: Paint/Pearl Mist Step by Step LO by Mandy

Wow beautiful page Mandy :D

Page 1 of 1 All times are UTC + 10 hours
Powered by phpBB © 2000, 2002, 2005, 2007 phpBB Group
http://www.phpbb.com/